Since I’ve been in the country for more than six months, one of my Visa requirements for the Bureau of Immigration was to get an NBI Clearance.
Not knowing what an NBI Clearance was and how to obtain it, I decided to google it in hopes of finding the government website.
My search for “NBI Clearance” brought me to website https://www.nbi-clearance.com. I was quite concerned that this wasn’t a “.gov.ph” site. Further investigation revealed this is a legit NBI site for online application and there are guides available with step by step processes on how to fill in the online form (note: for locals).
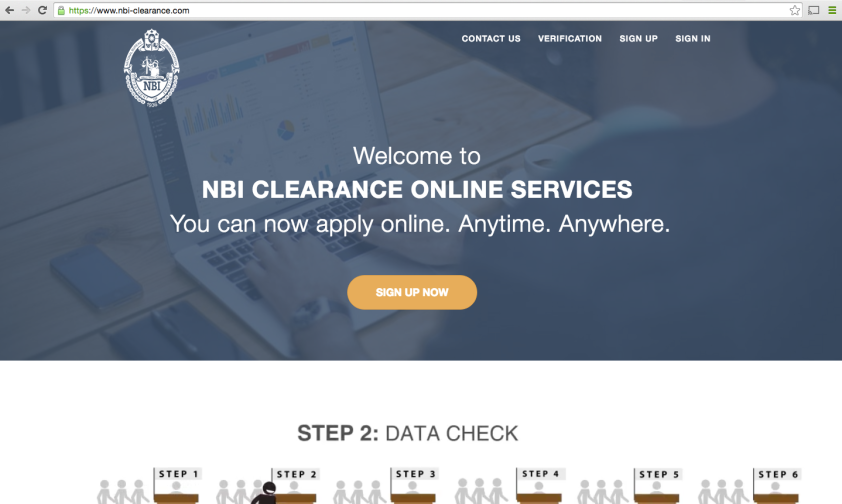
As a Foreigner, I can still use the online application form, but there is one CRUCIAL detail missing if you’ve come straight to this form. All foreigners must process their application at the main processing centre located on United Nations Ave in Manila.
Wouldn’t it be great to know this before going through Manila traffic in the opposite direction to reach the nearest processing centre only to find out after crazy queues that they can’t do anything for you? *sigh*
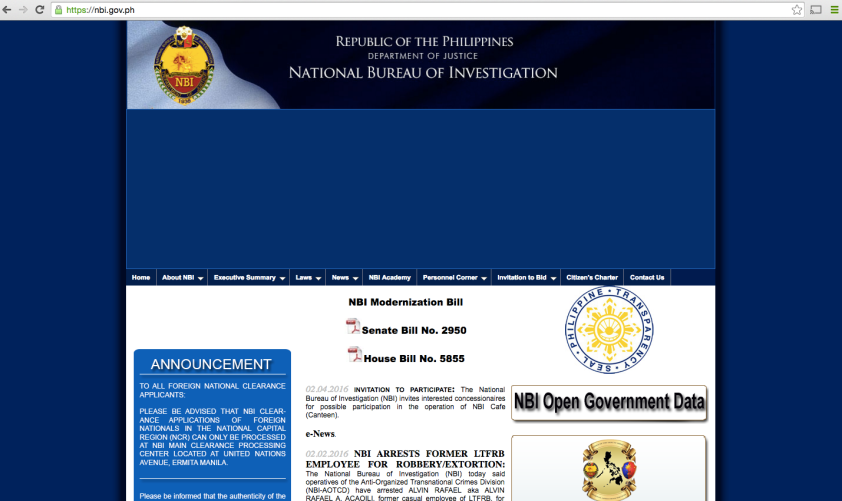
What I should have done first was google “NBI” instead of “NBI Clearance”, which would have taken me to the government site: https://nbi.gov.ph. (Note: the search result http://www.nbi.gov.ph doesn’t actually work or go anywhere. Which adds to the confusion since the gov.ph site was difficult for me to find).
On the home page under announcement, is a note that foreigners need to complete their applications at the main processing centre. Below it is a link that takes you to the online application form/website.
Now that we’re clear on having to do this at the main processing centre, let me give you a quick step by step on how this worked out for me.
- Fill out the online application.
- Payment options: I tried to do the online payment option. Sounds convenient right? Not if you’re a first timer. First you need to enrol online with your bank, which requires you to fill in a form, then go to the bank branch and submit the form where they would then enrol it online (after 2 days) before you can access it in your internet banking and pay online. Defeats the purpose doesn’t it? *sigh*
- Other payment options: Pay at the bank branch or queue up at the clearance office with reference number handy and pay at the payment counters (this latter step is what I ultimately did since the banks were closed).
- Once you have your official receipt, proceed to level 3 imaging and processing. (I was pregnant when doing this so I ended up on the express queue on level 4 instead). They’ll check your application and fix any errors here.
- Once imaging is completed, head to the “Alien/Foreigner” counter on level 2. They will give you a card to fill out (both sides) and take your fingerprints. (You’ll need to bring something to wipe off the ink. There’s no soap in the toilets to help you here).
- Return in a few days to pick up clearance at the releasing counter (or send a representative with the appropriate approvals).
Notes:
- Make sure you bring an original and copy of your ID. In this case they wanted the photo page of my passport which I submitted with the card at the “Alien/Foreigner” counter.
- To enter the complex, you’ll need to have your reference number handy to show security.
- For females, they don’t allow you in if you’re wearing a sleeveless dress/top. Luckily I had my shawl in my bag so they let me in, but just keep it in mind they do maintain a dress code, though it’s not specified what that may be (I’d assume short shorts were a no no too. I was wearing long pants and a maternity dress that only exposed my shoulders and they stopped me. Flip-flops are acceptable footwear).

Gone are the days that I do this thing.
LikeLiked by 1 person
It must be a great feeling hehe 🙂
LikeLiked by 1 person